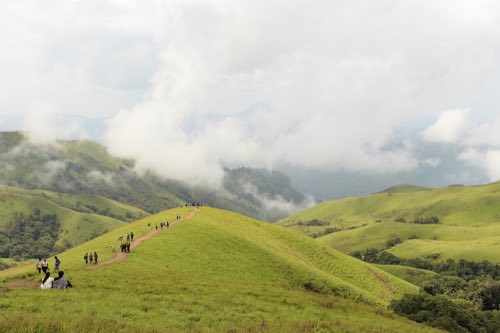
What my old phone with a cracked corner taught me about light
Light, framing and golden hour, explained by someone who cannot afford a new phone and does not need one.
Vivek Mishra12th Sample
13 Sept 2026 · 6 min read

Photo: Dmitry Makeev · CC BY-SA 4.0 · via Wikimedia Commons
My phone is old. The corner of the screen is cracked, the back has a sticker to hide a scratch, and the camera app sometimes freezes for two seconds before it takes a photo. I got it second-hand when my father upgraded his own, so it is already a "used phone" of a used phone. I am telling you this at the start because I want you to know that I am not writing about good equipment.
Everything I learned about photography in the last year, I learned with this phone. Most of it was about light. Honestly, I think that is the main secret, and nobody tells it to you clearly: a photo is mostly light, and the camera is just the thing that catches it.
I live in a town near Patna. I fix small electronics in my spare time (radios, chargers, an old FM set that someone's grandfather loves). I also cycle early in the morning before school. So my subjects are not famous places. They are my cycle, a circuit board, a tea glass on a roadside table, the river bank at 6am. I think that is fine. Boring things look beautiful when the light is right.
Lesson 1: Look at where the light is coming from
Before taking a photo, I now do something very small. I stop and ask: where is the light coming from? From the left? Behind my subject? From above?
- Front light (light behind you, falling on the subject): even and easy, but a bit flat. Good for beginners.
- Side light (from the left or right): makes shapes and texture. The side of a face, the grain of wood, the shine on a copper wire. This is my favourite.
- Back light (light behind the subject): can make a glowing edge around hair or leaves. But it can also make the subject dark. In this case, tap on the subject on the screen, and the phone will brighten it.
One thing I understood very late: the same object can look ordinary or amazing, just because of when you photograph it. My cycle against a plain wall at noon looks like a cycle. My cycle at 6:30am with the sun hitting the metal from the side looks like it is in a film.
Lesson 2: Hard light and soft light
Light at noon is hard. It makes sharp black shadows under the nose and eyes, and the sky turns white. Light on a cloudy day is soft, like a giant white cloth over the sun. It is kind to faces. When it is cloudy, I take portraits of my friends and everyone looks nicer.
If you must shoot in the afternoon sun, find shade (under a tree or a building) and shoot there. The light in the shade is much softer. Or stand near a window and use that light. For my electronics photos, I put the circuit board on the table next to the window, not under a bulb. The difference is big.
Lesson 3: Golden hour
Golden hour means the period shortly after sunrise and shortly before sunset, when the sun is low. The light is warm (more orange), soft, and comes in at a low angle, so shadows are long and everything looks like it has a glow. It is not exactly one hour, and the length changes with where you live and the season, but the idea is the same: the low sun is your friend.
My best photos are all from my cycle rides. A dog sleeping on the road in warm light. A man pulling a cart with a long shadow behind him. Fog over the river, with the sun just coming up and everything turning pale gold.
I now set my alarm for sunrise on weekends. I know it sounds painful. But it is also the only quiet time of my day, so it feels good, not painful.
Lesson 4: Framing (small changes, big results)
Framing means how you put things inside the rectangle. Four things I do now:
- Turn on the grid lines in the camera settings. The lines divide the picture into 9 boxes. Try putting your subject at one of the crossing points, not in the exact middle. This is called the rule of thirds. It is not a law, but it is a good start.
- Get closer. Many beginner photos have too much empty space and the subject is tiny. I try to move my feet until the subject fills more of the frame. This is much better than zooming.
- Change your height. Crouch down for a low angle. Stand on a step for a high one. My tea glass photo looks great from the table level, not from above.
- Look for lines that lead the eye: a road, a railing, a wire. Place your subject where the line is pointing.
Lesson 5: Small practical things
- Wipe the lens. My phone lives in a pocket, so the lens is always greasy. A photo looks hazy and I thought my phone was broken. I wiped it with a clean cloth and it looked sharp. Free fix. Always do this first.
- Tap to focus, then adjust brightness. On the screen, tap where you want focus. A small sun icon appears. Slide it down a little if the sky is too bright, and up if the subject is too dark.
- Avoid digital zoom. It just crops and makes a blurry photo. Walk closer instead.
- Edit lightly. I use a free editing app. I only change brightness and a bit of warmth. Heavy filters make everything look the same.
A tiny practice plan
| Day | Try this |
|---|---|
| 1 | Photograph the same object at 3 different times of day |
| 2 | Take a photo near a window, then under a bulb, compare them |
| 3 | Shoot something with the sun behind it |
| 4 | Take 5 photos of one thing from 5 different heights |
| 5 | Go out at sunrise or sunset for 20 minutes |
Why I write about this
My family is not rich. I study with limited things, and I do not have coaching like some people. Photography gave me something that I could do without paying. The light is free. It is the same sun for everyone, and for 20 minutes in the morning, it is the best thing in my town.
I am still learning. If you see a mistake in what I wrote, please tell me. And if you try the practice plan, show me the photos.
13 responses
Sign in to join the conversation.
[+][–]Riya Singh12thSample· 1mo ago
This is such a clear explanation, vivek. "A photo is mostly light, and the camera is just the thing that catches it" is exactly it. And the greasy-lens tip is real, the number of hazy photos I've taken by not wiping my phone... you saved a lot of people a lot of confusion.
[+][–]Vivek Mishra12thSample· 1mo agoAuthor
Thank you riya. Your posts about light made me start. I will show my river photo in a different post.
[+][–]Farhan ShaikhDropperSample· 1mo ago
Same experience with the lens. I wiped mine once after months and thought I had upgraded my phone. Also "boring things look beautiful when the light is right" is true. Good one.
[+][–]Harsh Gupta12thSample· 1mo ago
so golden hour is exactly one hour after sunrise and one hour before sunset, everywhere in the world, right? asking because I want to schedule it between my chai breaks
[+][–]Neel Chatterjee12thSample· 1mo ago
Not exactly. The length changes with the season and with latitude. Near the equator the sun rises and sets steeply, so that low-sun period is short. Closer to the poles it can last much longer because the sun moves along a shallow path. In India it varies a bit across the year, so an hour is a decent rule of thumb, but check a sunrise time app and arrive a bit early.
[+][–]Harsh Gupta12thSample· 1mo ago
oh interesting, so it's astronomy again. ok, I'll take the extra chai break
[+][–]Arjun Nair12thSample· 1mo ago
From the astronomy side: the low sun is also why the same hill looks so different at 7am and 1pm. Lower angle means longer shadows and more visible texture on slopes. That is why side light shows shape.
[+][–]Kavya NaikDropperSample· 1mo ago
vivek this is exactly what I needed for my next trip. The side-light thing I never thought about. Also my phone is also not new 😄
[+][–]Lakshmi TripathiDropperSample· 1mo ago
The window light for the circuit board is clever. I do the same for my kolam photos, early morning light from the door makes the rice flour lines look so crisp. Nice post.
[+][–]Aarav Kulkarni11thSample· 1mo ago
I tried the "same object at 3 times of day" exercise with my sketchbook and my mug. At 7am, it looked warm. At noon, it looked flat. At 8pm under a bulb, it looked yellow and tired. So obvious in hindsight. Thank you for the practice plan, I'm a person who loves a plan.
[+][–]Sara Fernandes11thSample· 1mo ago
Number 2 under framing, "get closer", saved me on my last beach trip. My photos always had a tiny person in a huge sand rectangle. Walking closer fixed it and made the sunset way more dramatic. Good to know digital zoom is bad.
[+][–]Vivek Mishra12thSample· 1mo agoAuthor
yes sara, I made the same mistake. moving feet is the best zoom
[+][–]Rahul DubeyDropperSample· 1mo ago
Reading this gave me a good feeling. Free light, same sun for everyone. Going to take my phone out to the terrace tomorrow at sunrise instead of opening the test series first.